Few flowers carry the profound emotional weight, historical resonance, and timeless beauty of fresh garden roses. Whether preserved from a momentous wedding bridal bouquet, an anniversary dinner, a sentimental graduation gift, or simply handpicked from your own summer flower bed, roses capture irreplaceable memories. However, fresh cut blooms inevitably wither and fade within a matter of days. Pressing roses offers a wonderful, enduring artistic technique that allows flower lovers to capture their delicate petal contours, subtle color gradients, and botanical elegance for years, transforming fragile blossoms into museum-grade framed wall art.
Because roses are relatively dense flowers with voluminous petals, thick seed calyxes, and high cellular moisture content, successfully pressing them without inviting mildew or brown discoloration requires specific botanical preparation techniques. Unlike delicate flat field blossoms such as violas or cosmos, pressing an entire thick rose bud directly into a standard paper press often results in crushed, rotting centers. Understanding how flower preservation bridges the emotional sentiments explored in the secret language of roses and their color symbolism with proper drying science is the true secret to creating heirloom quality floral decor.
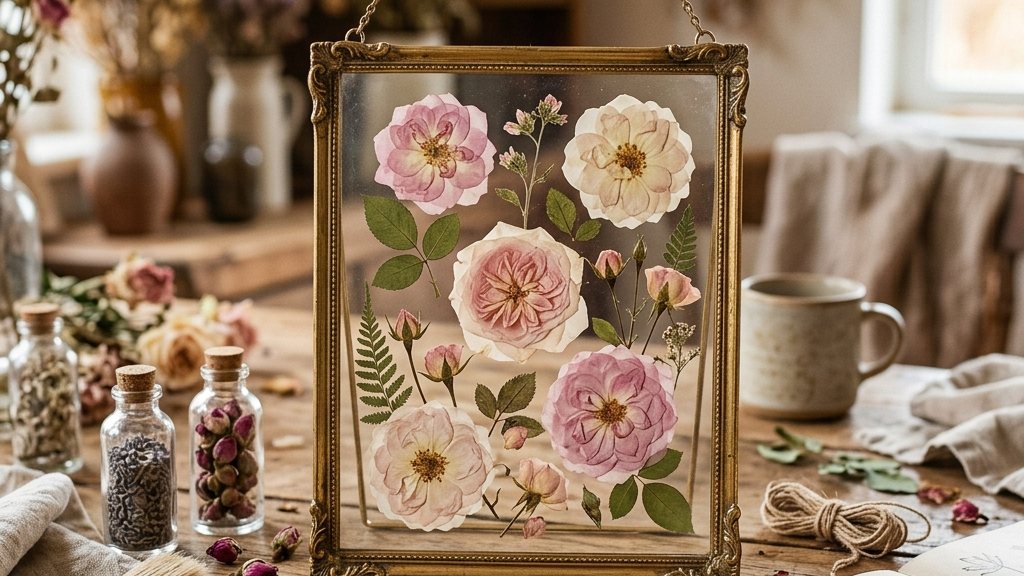
Table of Contents
Choosing the Best Roses and Timing Your Harvest
The final aesthetic outcome of your pressed botanical art begins out in the garden or floral vase long before any mechanical weight is applied. Adhering to strict harvesting standards ensures crisp, vibrant petals rather than brittle, browned specimens:
- Select Blooms Just Before Full Maturity: The ideal rose for pressing is one that has just begun opening its inner petals, roughly one-third to one-half expanded. Blooms that have already reached full blowout maturity often have loose petals that shed instantly when pressed, and their cellular moisture is prone to rapid enzymatic browning.
- Harvest in Late Morning Sunshine: Never harvest roses early in the morning when ambient outdoor dew coats the petals, nor late in the evening after rain showers. Excess surface moisture is the primary culprit behind grey mold (Botrytis cinerea). Wait until late morning after the sun has gently evaporated all external droplets but before midday heat stresses the stem.
- Select Varieties with Natural Color Retention: Deep pinks, rich reds, vibrant oranges, and soft peach tones maintain their pigments remarkably well throughout the dehydration process. You can explore the fascinating background of vibrant varieties in our guide to orange rose meaning and passion symbolism as well as the gentle warmth of peach rose meaning and gifting etiquette. Pure white roses tend to turn slightly ivory or antique beige over time, which offers a lovely vintage look when framed against dark linen.
Botanical Preparation: Deconstructing the Thick Calyx
Because a fresh rose bud possesses a thick fleshy green receptacle at the base, attempting to press the entire bloom flat in one piece usually produces an uneven lump where the outer petals crush into powder while the moist center rots. Botanical artisans employ two proven preparation strategies:
- The Petal-by-Petal Deconstruction Method: Gently detach the rose petals individually from the base, keeping them organized by concentric ring layer (outer guard petals, mid-layer petals, and small core petals). Press the petals separately between acid-free blotting sheets. Once thoroughly dried and flattened, reconstruct the rose blossom flat onto your framing cardstock using minute drops of pH-neutral archival PVA craft glue. This method achieves the most perfectly flat and vibrant result.
- The Razor Halving Technique: For smaller spray roses or semi-opened garden tea roses, use an ultra-sharp surgical scalpel or fresh razor blade to slice the entire bud vertically in half right through the stem and center receptacle. Scoop out excess fleshy internal ovary tissue with the tip of the blade, allowing the remaining two halves to lie remarkably flat against the pressing paper.
Comparison of Rose Pressing Methods
Depending on your budget, available craft tools, and turnaround time, several pressing methods yield reliable results. Review the comprehensive matrix below to determine the ideal workflow for your home studio:
| Pressing Technique | Dehydration Duration | Color Preservation Quality | Equipment and Supplies Required | Best Suited For |
|---|---|---|---|---|
| Traditional Wooden Flower Press | 2 to 4 Weeks | Excellent (Gradual cellular drying) | Plywood press plates, wing nuts, acid-free blotting paper, cardboard | Large batches, heirloom keepsakes, authentic botanical herbarium sheets |
| Heavy Hardcover Book Method | 3 to 4 Weeks | Good to Moderate | Heavy encyclopedia, unglazed newsprint or parchment paper, added weights | Casual crafters, quick single-petal pressing without dedicated gear |
| Microwave Flower Press | 3 to 5 Minutes | Superior (Rapid pigment locking) | Ceramic microwave press tiles, wool felt pads, microwave oven | Bright vivid colors, fast turnaround, urgent memorial preservation |
| Granular Silica Gel Desiccant | 5 to 7 Days (3D Form) | Outstanding (Maintains 3D shape) | Airtight container, fine silica gel crystals, soft makeup brush | Shadowbox 3D displays where flat two-dimensional pressing is not desired |
Step-by-Step Guide to Traditional Pressing with Acid-Free Blotting Paper
The traditional press remains the golden standard for flat botanical illustrations. Follow these detailed steps for guaranteed success:
Step 1: Layering the Pressing Sandwich
Place the bottom wooden press board on a flat table. Lay down a sheet of corrugated cardboard, followed by two sheets of untreated, acid-free cotton blotting paper. Avoid textured kitchen paper towels, as their embossed waffle patterns will permanently emboss unsightly grid lines into your rose petals.
Step 2: Spacing Petals and Foliage
Arrange your rose petals or halved buds onto the blotting sheet, ensuring at least one inch of breathing space between adjacent pieces. They must never touch or overlap during the pressing phase, as moisture transfer will bind them together into a mushy clump. Add a few delicate green rose leaves or miniature sprigs to enrich your future frame composition, honoring the historical heritage of floral communication detailed in our guide to the language of flowers and Victorian floriography.
Step 3: Applying Steady, Uniform Pressure
Carefully lower two top sheets of blotting paper over the flowers, followed by another piece of corrugated cardboard. You can build up several tiers within the press. Fasten the top wooden plate and tighten the carriage bolts and wing nuts firmly and evenly. Keep the press in a warm, dry, dark room with excellent air circulation.
Step 4: Changing Blotting Sheets After 72 Hours
During the initial three days, roses release over 80 percent of their internal moisture into the surrounding paper. Open the press on day three and carefully transfer the flowers to fresh, bone-dry blotting sheets. This single step prevents stubborn fungal spores from establishing and preserves bright petal luminescence.
Framing and Long-Term Display Preservation
After three to four weeks, your rose petals will be paper-thin, crisp, and translucent. Handling them with broad-tipped stainless steel stamp tweezers, arrange your botanical composition inside a double-glass floating frame or against a background of handmade acid-free watercolor paper.
Secure the petals using tiny specks of clear, acid-free methyl cellulose or archival PVA glue applied with a fine sable watercolor brush. Seal the frame backing tightly to lock out ambient humidity. Most importantly, hang your completed framed botanical art on an interior wall that receives gentle indirect ambient lighting, completely away from direct sunbeams, heating vents, or bathroom humidity. UV-protective museum glass is strongly recommended to shield delicate natural organic anthocyanin pigments from solar fading for decades to come.
Conclusion
Pressing roses for framing is an enchanting, mindful craft that unites artistic patience with botanical science. By carefully selecting fresh healthy blooms, deconstructing bulky calyx structures, applying disciplined drying pressure, and framing your botanical treasures behind archival UV glass, you preserve fleeting floral magic into a timeless, elegant keepsake that will brighten your home for generations.